Saturday, March 26, 2011

Herb Garden is Waking Up


Chives and Lemon Balm

Mint for Mojitos?!?

Expected Low 38 Degrees - Cold Rain Falling Tonight

I got a little work done in the garden this morning in anticipation of rain this afternoon.  I pulled up all the matured and bolted greens, including the yukina asian greens, the tendergreen mustard, the winterbor kale, and the carolina collards.  They have provided us with a good yield and some very tasty meals this winter / spring.  In their place I sowed more seed ... a couple short rows of arugula, several short rows of tendergreen mustard and southern giant curled mustard, and a row of smooth spring kale.  I am going to keep the lightweight row cover over my greens in the hope of deterring pests.

I cut the side shoots of broccoli and made my first cutting of Toscano kale.   Such a beautiful variety of kale ... dark green color!  Overcast skies downplay the rich color, but I wanted to remember this bowlful of goodness.  Can't wait to try it on the dinner plate.

Last Cutting of Overwintered Collards

Collards get a bad rap. Some folks say they can't stand the way they smell when cooking. Others have bad memories of disgusting mounds of a dark-green, stringy vegetable piled on their school lunch plate. While it is true that improperly cleaned collards can be stringy ... and overcooked collards are often slimy and will emit an unpleasant sulfur smell ... it doesn't have to be that way!

Widely considered to be a healthy food, collards are a good source of vitamin C and soluble fiber, and they contain multiple nutrients with potent anti-cancer properties.  We southerners love our greens, but tradition says they must be boiled for hours to cook the bitter out of them. Not so! Collards don't have to be overcooked to be delicious.

Here's how to prepare tasty, nutritious, appetizing collards. Wash the leaves carefully; remove the stems; coarsely chop or cut into strips. Bring a pot of salted water to a boil; add collards; cook 8 to 10 minutes until soft.  Remove greens from hot water; plunge them into ice water to stop the cooking process and to set the bright green color; drain.  Now they're ready to season and prepare in any number of ways!

Below is a recipe I recently discovered, adapted from Vegan Soul Kitchen by Bryant Terry.  When served collards prepared this way my sister, Janet, said they didn't even taste like collards!

Citrus Collards with Raisins
4 servings

1 Tablespoon + 1 teaspoon course sea salt
2 large bunches collard greens, rinse and drained, ribs removed, cut into a chiffonade*(about 12 cups)
1 tablespoon extra-virgin olive oil
2 cloves garlic, minced
1/4 cup raisins
1/3 cup freshly squeezed orange juice

In a large pot over high heat, bring 3 quarts of water to a boil and add 1 tablespoon salt.  Add the collards and cook, uncovered, for 8 to 10 minutes, until softened.  Meanwhile, prepare a large bowl of ice water to cool the collards.

Remove the collards from the heat, drain, and plunge them into the bowl of cold water to stop cooking and set the color of the greens. Drain by gently pressing the greens against a colander.
In a medium-size sauté pan, combine the olive oil and the garlic; raise the heat to medium. Sauté for 1 minute. Add the collards, raisins, and 1/2 teaspoon salt. Sauté for 3 minutes, stirring frequently.

Add orange juice, cook an additional 15 seconds. Do not overcook (collards should be bright green). Season with additional salt to taste if needed and serve immediately.

-----------------------------------------------------------------------------

*Chiffonade is a cooking technique in which herbs or leafy green vegetables (such as spinach and basil) are cut into long, thin strips. This is generally accomplished by stacking leaves, rolling them tightly, then cutting across the rolled leaves with a sharp knife, producing fine ribbons.  "Chiffon" is French for "rag" referring to the fabric-like strips that result from this technique.

Thursday, March 24, 2011

My Salad Bowl is Full!

Fresh... Green...Crunchy... Clean... Spicy... Tender... Tasty... Lean! The lettuce, spinach, and miscellaneous baby greens have made for some delicious salad mixes.  Nothing can compare to a salad fresh from the garden.

The spinach is spectacular cooked, as well. Lightly steamed or sauted; tossed with olive oil, garlic, lemon juice or flavored vinegar; combined with other veggies, beans, rice; thrown into an omelet or quiche.  I'm gearing up for some tasty green smoothies, too!

Wednesday, March 23, 2011


Barack and one of his ladies, stepping out!
 

Tuesday, March 22, 2011

Bolting Brassica

Toscano Kale, Bolting Winterbor
Flowering Mustard
It was 86 degrees today ... too hot for the early spring garden. Everything is bolting... the arugula, the kale, the collards. And now it's official - the overwintered cabbage will not be heading up this spring. It's bolting along with everything else.

Decorative Kale - Bolting
When plants form a seed stalk pre-maturely,  i.e. begin to flower, it's called "bolting." This can be a problem with spring crops. Most plants bolt due to hot weather. When the ground temperature rises above a certain point, the plant is prompted to produce flowers and seeds very rapidly, abandoning leaf growth almost completely.
Kale Bouquet
Tasty leaves removed!
Bolting is a survival mechanism in a plant. If warm weather threatens its survival, a plant will attempt to produce the next generation as quickly as possible. Why is this important? Once a plant has fully bolted, it is typically inedible. As energy reserves become focused on producing seeds, the rest of the plant tends to become tough and woody, tasteless or bitter. What is merely disappointing for the home gardener may prove to be disastrous for the professional farmer if plants bolt before producing an economic crop.

Occasionally, if you catch a plant in the very early stages of bolting, you can temporarily reverse the process by snipping off the flowers and flower buds. In some plants, basil for example, the plant will stop bolting and will resume producing leaves. In many plants, though, such as broccoli and lettuce, this step only allows you some extra time to harvest the crop before it becomes inedible.  So that's what I've been doing ... staying one step ahead of the bolt!


As I have documented in previous posts, the mustard bolted long ago.  It has already been harvested and what remains in the garden has now gone completely to flower. I won't hold that against it, though.  Its cheery yellow blooms brighten up the garden.


Warmer than normal conditions have mandated that I harvest my broccoli more "sharply" this spring, taking less-mature heads than normal.  The good news:  Even though the central stalks were smaller than expected at harvest, the plants are producing many delicious side branches.

I cut the largest leaves of the collard greens. They are such a rich, dark green color... you just know they're going to be good for you! I hope the smaller leaves will continue to grow in the next week or so without getting too bitter to enjoy.


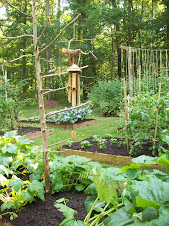
I cut all the winterbor kale today. The leaves were green and gorgeous. One of the best things about gardening in the early spring ... no bugs! While the winterbor has bolted, the sturdy, dark green toscano kale is still going strong. Choice of plant variety does make a difference.


Some varieties of cabbage are more tolerant to heat than others.  The type I planted last fall obviously was not one of them.  I'm looking at complete crop loss this year.  Every plant is bolting.  The chickens will be feasting on cabbage for a good long time!

Cabbage is known to overwinter in most of the extreme eastern and southeastern parts of NC. But I have witnessed successful overwintering right here in Pittsboro. Perhaps a little success leads to hope beyond reason? Oh well, nothing gambled, nothing gained. I had $1 invested in a total of nine cabbage plants. It was worth the risk.  I'll have to look for these varieties next year, known for overwintering capabilities: 'Bravo', 'Green Cup', 'Rio Verde' and 'Conquest'.

Saturday, March 12, 2011

Chicken Returns to the Flock

Our sickly chicken has fully recovered and is no longer in isolation.  She has been returned to the hen house without repercussion.  Everybody's happy and getting along just fine.  We'll never know what was ailing the poor girl.  Just a late winter cold, I guess!

Tuesday, March 8, 2011

The Scoop from the Chicken Coop

The condition of our sick chicken has improved daily.  The past three days we've allowed her to free-range with the rest of the flock in the late afternoons.  But when it comes time to go to roost, she doesn't head to the hen house with the rest of the ladies.  She settles in to roost in the barn.  Her choice?  Or is she being bullied?  Has she fallen so far down the pecking order that the other hens won't even let her in the coop?  I haven't witnessed any pecking or other hurtful behavior, but I haven't been outside exactly at beddy-bye time.  I'll have to pay better attention.

In other yard bird news, we've found two different possums in the hen house on two different occasions since the weekend.  Rouse went out late one night to close everything up and sensed an unusual movement in the coop.  There on the perches, midst the slumbering chickens, was a young possum!  He was playing chicken.  Rouse chased him away.  Then Sunday night, Rouse and I both went to close up the chickens sort of late ... after Sunday dinner.  There was a different possum, in the feed container, feasting away!  It didn't seem to bother him at all that we had interrupted his supper, until Rouse alternately shooed and punted him out of the hen house.

We're lucky to not have lost any chickens.  Lesson learned?  It really is important to close up the chickens at dusk, before the bad predators come out.  Now that these critters are in the habit of frequenting our hen house, we may have to get out the ol' have-a-heart trap and carry out "Operation Possum Relocation".  Anybody want a possum?

Monday, March 7, 2011

Radishes and Beets

With the potatoes duly tucked in, my attention turned to other root vegetables, namely beets and radishes. First, I pulled up the radishes that had managed to over-winter under cover ... a half row each of the small tricolor Easter Egg radish and Shunkyo semi-long specialty radish. Their roots had matured and some were surprisingly crispy and tasty. Others were obviously cold-hurt. I put the good ones in the 'fridge and fed the bad ones to the chickens. In their place I planted a full row of the Easter Egg radishes. These radishes are small and round, and come in three colors ... white, pinky-red, and purply-red. This row of radishes joins the already established row of Red Globes (the familiar-looking red and white radish) planted February 19.

But wait! There's still room in the bed for two rows of Round Red Ace, a hybrid beet. So ... two rows of radishes, two rows of beets, and down the middle - a row of carrot seedlings that have successfully over-wintered. Forty-eight square feet full of potential deliciousness!

Two rows of beets, however, is not going to be enough to satisfy this family. I turned to another empty bed and planted three 12' rows of Ruby Queen beets.  That ought to hold us.

Start the countdown ... ~30 days to zesty radishes and 50 days to beautiful beets!

Potatoes are Tucked into their Lazy Beds

50-some degrees under a clear blue sky made for an enjoyable morning in the garden.  My primary goal was to get the potatoes planted.  Two beds had already been cleared of past season debris.  I simply loosened the soil a bit and placed my seed pieces - cut side down - on top of the dirt. I made three 12' rows in each of the two raised beds.  I placed the potato chunks about 6" apart in each row, then covered them with a thick layer of autumn leaves - raked and piled up last fall for just this purpose.  This method of planting potatoes is called making a "lazy bed". The lower bed contains Purple Vikings and Yukon Golds.  The upper bed contains French Fingerlings and Yellow Finns.

I had a few left-over seed pieces of the Purple Vikings and the Yukon Golds left.  Plus, Andrew had given me a few sprouted Cranberry Red potatoes that had been discarded from his workplace.  I used a garden rake to scratch up an area near the edge of the woods just beyond the black raspberry patch.  I scattered the extra potatoes on the ground and covered them with leaves.  That's about as lazy as it gets!  If there's enough sun I expect potatoes will grow.  My only concern is the granddog.  Grayson was keeping me company this morning.  Twice I had to chase him away as he tried to eat some of the potato chunks!

Friday, March 4, 2011

Early Spring is Here

The sugar snaps are just peeking out of the ground. A green line of radish sprouts has appeared. Water and warmth work wonders!

Chicken Update

The chicken has mostly been resting in the privacy of her isolation crate. Tuesday she had a poo ... Green and slimy looking. She has laid no eggs this week. I had to chase Barack away from her crate Wednesday afternoon. He was free-ranging and looking for a little action. She was not interested, and his attention and attempts to get at her in the crate inspired some surprisingly perky behavior. After that bit of excitement she was worn out and went back to her napping posture. Yesterday afternoon she was standing up and scratching around the crate. I'm feeling optimistic. Maybe she just needed a vacation!

Potatoes

Many potato varieties produce large seed with multiple growth buds called eyes. These larger whole-seed potatoes (2" or more in diameter) may be cut into pieces to make more "seeds", increasing yield. You just have to be sure each potato chunk has at least one or two eyes.

My seed potatoes are now cut into sections and spread out in cardboard boxes where they will air dry at room temperature for the next 2 - 4 days. I'll plant them Sunday afternoon or Monday, depending on the weather. Purple Vikings and Yukon Golds have become standard in my garden. In addition, this year I'm trying Yellow Finns and French Fingerlings.

Tuesday, March 1, 2011

Wonderful Water

Strong thunderstorms moved through the area last night. I didn't check my rain gauge, but we had a decent amount of rain. Mother Nature waters so much more efficiently and effectively than I can with my garden hose!